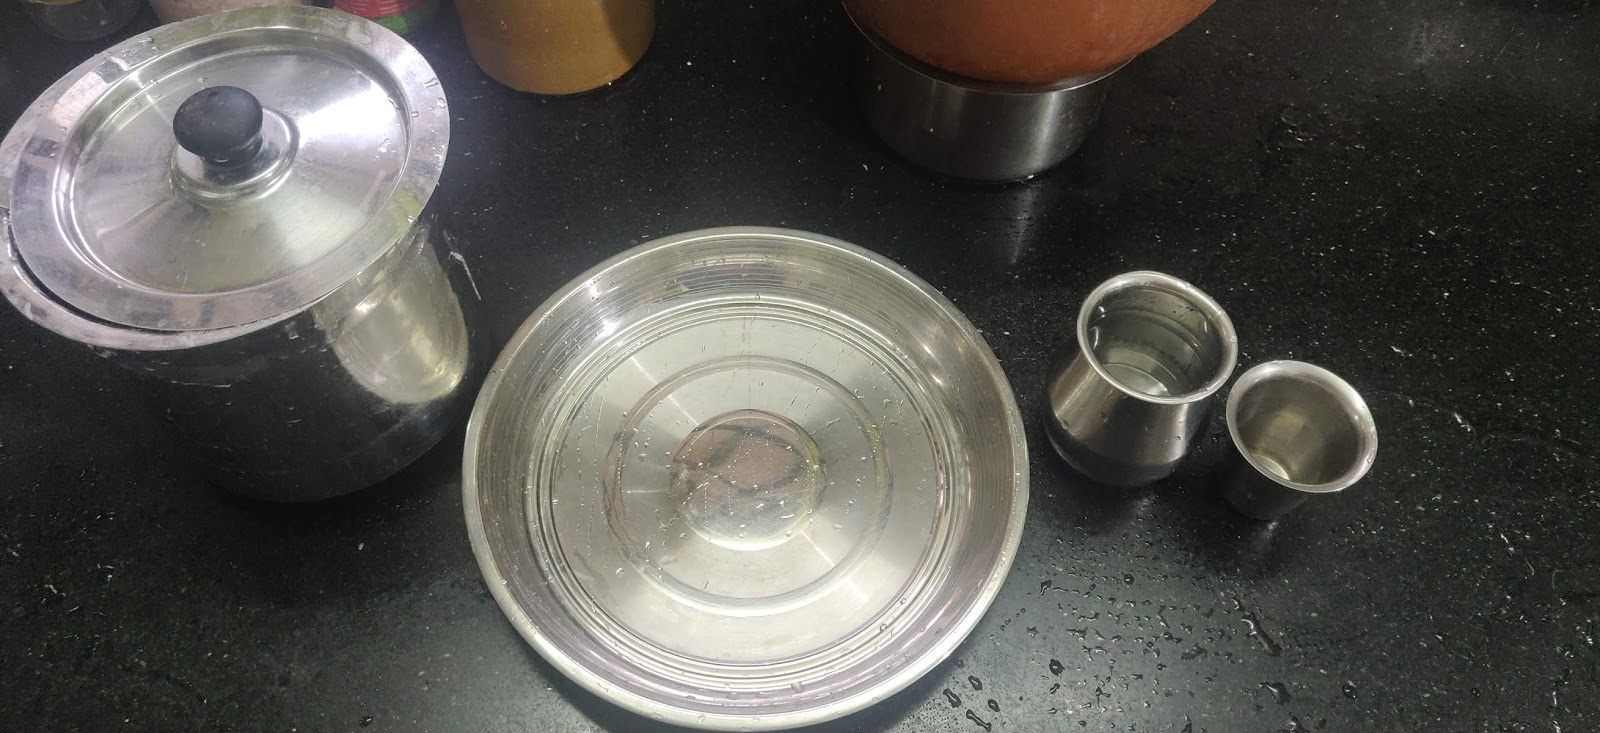
Karuppu Kavuni Idli Batter
The Rolls Royce of Idli Batters
Native rice and grains , which were long forgotten in favour of quicker and softer varieties, are back in the spotlight. While most of us would have heard of / experienced native grains, unless we use it on a daily basis, it hardly makes a difference to our overall health.
The best way to adopt native grains , is by using them in our daily staples . Down South, native grains lend themselves beautifully to Idiyappam, idli, dosai and for regular plain rice. However, it is important to understand the varieties that are suitable for each staple. Millets such as Kodo, Little Millet and Barnyard millet (Varagu, Saamai and Kuthiraivaali), can be used for both Dosai/Idli batters and cooking them as rice. The thicker red, black rice varieties however, cannot be cooked as rice - or won't be palatable to most of us used to soft, short grain rice.
Why switch to native rice/ millets?
First and foremost, they are delicious and leave you satisfied and fuller for longer. If these are not reasons enough, read on.
Tamil Nadu had over 10,000 types of indigenous rice varieties - each with its own unique flavour, colour and nutrient values. While they are naturally rich in minerals and B vitamins and antioxidants (the coloured rice varieties in particular) , each type had a purpose - Mapillai Samba is said to be great for the nervous system, Kulivedichan rice was given to new mothers to improve lactation, Kaatuyanam for controlling blood sugar, Kullakaar for purifying blood and so on. This wisdom is now lost and our plates have become monochromatic with generic white rice. Native rice varieties have a lower glycemic index. This means they release sugars very slowly into the blood stream - especially when ground without polishing. Switching to native rice for everyday use has tremendous health benefits. Did I say they are much cheaper than Basmati rice?
It is time we stepped up beyond regular Idli rice and Basmati rice.
Idli batters are a great way to use all native grains - rice, little millet and traditional millets such as Ragi, Kambu/Bajra. I therefore start with batter making. Batters are versatile and come in handy through the work week. The first couple of days when the batter is fluffy and not too sour, it is great for idlis. As it turns a little sour after the first two days, dosais come out great and beyond the third day, it turns into Kuzhi paniyaram batter. Batter gets me through 3-4 days of the week ; a quick fix for breakfast, dinner paired either with the humble podi or an elaborate chutney / sambar/ kurma. The family loves them and my 6 year old son approves of them - which makes them pass the ultimate taste test.
What makes a great idli batter?
Our family is a stickler for good idlis - to the extent we judge each other by how soft the idlis in a house are. We learnt to make batter watching our grandmothers and mothers patiently grind them at least 2-3 times a week to feed the whole family.
The perfect idli batter depends on three factors:
- Quality and proportions of the rice and urad dal: Idli rice, is always parboiled, not raw. This makes them fluffy, pliable and easy to digest. Go beyond your IR 20 and other regular idli rice. Any sort of parboiled indigenous rice is great. If your Urad dal (Ulundu) is good quality, rice to urad can be even 6:1. If you are stuck with store bought regular urad, keep it at 4:1. Four parts rice to one part urad dal.
- Grinding and Mixing it at the right temperature: Idli batter making is a messy process that has to be done with the hands. The soaking, cleaning, mixing, have to be done with clean hands. The body temperature and natural microbes help with the fermentation. It cannot be done with a spatula.
- Fermenting it enough: Batter has to ferment till it rises to almost double it size. In India, it is at least 5-6 hours in the hot summer and 8-9 nine hours in other months.
Karuppu Kavuni idli batter, is perhaps the Rolls Royce of all idli batters. Karuppu Kavuni falls under the black rice category - rich in fibre, anti oxidants , iron and protein, it considered a food fit only for the kings. It was therefore called "forbidden rice", or rice that was reserved only for royalty, for longevity and good health. Black rice has also been used in Chinese culture for centuries, for its medicinal values. Research shows that the rice is a potent anti diabetic and reduces arthritis.
Karuppu Kavuni is a 140 days crop. If you are interested, watch this video of the crop being cultivated in TamilNadu.
Now, on to the idli making. I have broken it down into 5 phases, with the process and rules for each - Prep, Soak, Grind, Mix and Making
1. The Prep
Karuppu Kavuni , is a unique, very soft, sticky rice. It is not firm in texture after grinding. During the soak and grind, it gives out a purple colour - do not be alarmed. It is the nature of the rice and is a sign of all the anti oxidants it has to offer. Due to its sticky nature, the rice has to be mixed with some other rice , to be able to make idli. Two parts of Karuppu Kavuni to three parts of any other parboiled native rice, works. Here, I have used unpolished Thooyamalli rice. If you do not have any other native rice, make it two parts Kavuni to three parts regular idli rice.
Karuppu Kavuni Rice
Notice the deep purple hues hidden behind the black and brown tinted grains. Karuppu Kavuni is such a beautiful, long grained rice.


Methi seeds / Vendhayam Thooyamalli Rice


Kavuni Arisi Idli:
Kavuni Rice - 2 cups
Thooyamalli Rice / Regular Idli Rice - 3 cups.
Mix these two rice varieties together.
Urad Dal - 1.25 cups
Methi seeds - one tablespoon
Wash the rice and Urad dal separately , multiple times. Wash till the water in the urad dal runs clear. The Kavuni rice, Thooyamalli rice mixture will not run clean and will leach deep purple - which is totally good . Wash around 5 times.
2. The Soak
Soak the rice and methi separately, urad separately.
If you are soaking overnight:
Soak rice + methi, urad dal in separate containers and chuck it inside the fridge asap. Works great to keep the mix cold for the morning grind. Do this the last thing before you go to bed in the night, so it does not soak for too long.
If you plan to soak during the day:
Soak rice and methi for 4 hours in the fridge . Soak Urad dal for 1 - 2 hours in the fridge. If you live in a relatively cold place such as Bangalore (I am from Trichy - Bangalore IS cold on a relative scale:-) ), you can leave the soak outside.
Make sure you have at least 6-8 hours for the batter to ferment after grinding.

3. The Grind
Idli Batter HAS to be made in a Wet grinder. The wet grinder is like my right hand in the kitchen. I would be lost without this nifty device , just like a typical South Indian mother.
Rules for grinding :
1. Control Temperature
The cardinal rule of idli batter making, is temperature control.
The Urad dal has to be ground cold - straight from the fridge. The process of grinding causes a lot of heat. If the machine heats up after a while, the batter starts heating up too and turns sour faster.
2. Grind Urad Dal and Rice separately
Grind the urad dal gradually, sprinkling a few spoonfuls of ice cold water at a time. The wet grinder does the job slowly, incorporating air into the Urad Dal. You would notice that the Urad goes from pale while to a RIN TV commercial white. It gets super fluffy and you will see the magic of a little urad transform into a gigantic white airy mass, many times its original size. The better your urad dal, the more batter you will end up with.
If you do not have a grinder, you can try the plain old mixie blender. But the Urad Dal will not get fluffy enough .
3. Grind fine
The Urad Dal is ready when it is super smooth, very white and floats when dropped in water. Depending on your grinder, this will take 35 mins to 50 mins for the proportions given above.
Pour the Urad Dal batter into a big wide vessel that gives you ample space to pour the rice after it is ground and mix it all together

The rice has to be ground till you get no grits when you rub it between your thumb and index finger.
Pour the ground rice on top of the ground urad dal batter. Here is an image of the ground Kavuni rice mix on top of the ground urad dal.


4. The mix
You will now have two layers - urad and rice ground up and poured into a vessel large enough to let you handwhip the hell out of this batter.
Take a heaped tablespoon of Himalayan rock salt / Rock Sea Salt and drop it on the mixture. Then go in with clean hands and start mixing. The urad, rice and salt should blend into a homogenous mixture, indistinguishable from one another. This is a proper tricep / shoulder workout. Get ready to experience some pain. Take it slowly. I usually play some proper dance music to get through this . Nowadays, I play "Vaathi coming" in full volume and my batter is mixed well by the time it is over. My speakers are on all through the idli batter process and I believe it brings good cheer to my idlis :)
Check this video for consistency. Not too runny, not too thick either. Add in water if needed. The batter has to be mixed in the right consistency before fermenting. You cannot make do with adding water after the ferment. It is simply not the same.

As soon as you have beaten the batter well, immediately transfer the batter into 2 or 3 deep vessels, filling each only to half its height. The remaining 50% space is important for the batter to rise properly.
5. The Ferment
Fermentation is the life of a good idli batter
During fermentation the volume of idli batter almost doubles its original volume. This is due to the build of of lactic acid bacteria and enzymes into the batter and entrapment of air. Microorganisms present in the air get attracted to the sugars, starch in the batter. In the presence of oxygen, they latch on to the batter and start to multiply. The urad dal supports the growth of the bacteria, as it is a protein. This process of build up in bacteria and enzymes, helps breakdown and digest the food easily, making the idli a nutritious wonder. Depending on the heat in the place where you live, the batter has to be fermented till it doubles and forms glorious bubbles when you turn a ladle into it.
Here is the batter after it is risen.
6. The Making
The softest idlis are made with perforated idli plates, lined with a cloth. I guard my idli cloth closely. The more it is used, the better the perforations. But any thick cloth cut to the shape of the pan would do. I am used to this method, but feel free to use an oiled non-perforated idli pan, if that's what you have.
Rules :
1. Do not make very big idlis. My mum says " Idli paandhama irukanum" - they should be petite. The batter should just about fill the idli mould to the surface. Give them space to rise.
2. Get the water boiling before you put your filled idli plates inside. The steam should hit the batter as soon as it goes inside.
3. Do not over cook the idlis. 5-7 minutes based on the depth of your pan. Check with a toothpick and get the idlis out as soon as they are done.
Before fetching the steamed idlis, have a plate and a bowl of water ready to sprinkle on the idlis as soon as they come out. The cold water sprinkle on releases the steaming hot idlis from the surface they are sticking to and makes it easier to collect them. This works even if you are using a spoon to scoop up the idlis out of the plates. Watch the video below.
There is only one rule for eating these lovely deep purple idlis. Down them hot out of the pan with a spicy chutney of your choice. You will feel the goodness, the pillowy texture and melt in your mouth softness that are the hallmarks of a great idli.
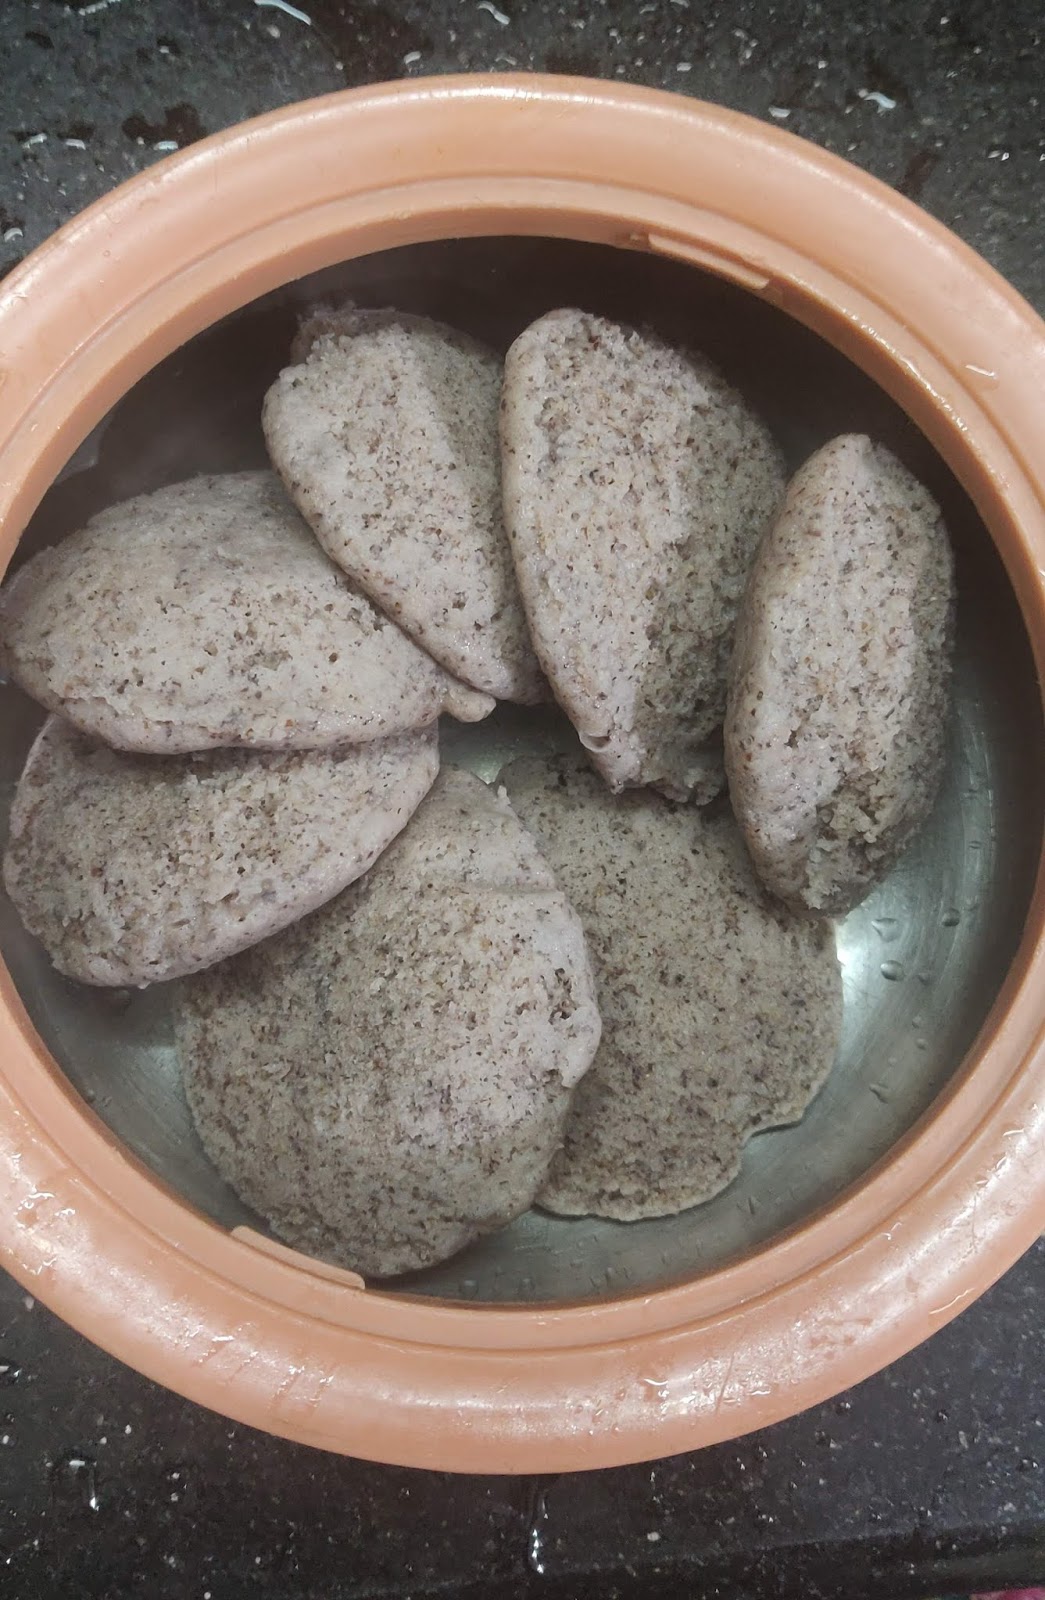
Karuppu Kavuni idlis paired with Milagai Podi (Gun Powder ), Pirandai Thogayal, Tomato Chutney

The same batter used on the third day for dosai. Dosai batter has to be runnier than idli batter. Take it out of the fridge and add water to dilute before making dosais.
Check out the crispy perfection and vivid purple colour on the Karuppu Kavuni Dosai. Paired with some Pacha milagai chutney (Green chilli chutney) and Pudalangai Seed Thogayal (Snake gourd seed chutney).

If you are would like to buy Karuppu Kavuni rice, check the nearest super market such as Nilgiris. Better still , buy from known organic brands /shops. If you are in Chennai, please send me a message and I can send you the names and numbers of some trusted sources.
That brings me to the end of this very long post on Karuppu Kavuni batter . Hope it gives you as much joy as it has given me. If you liked this post and would like to know more about using native rice varieties, leave a comment below.
Sangeeta, you inspire so many of us! I live outside Tamil Nadu. The local millets here could thus be different - but the concept by itself is very helpful. Thank you!
ReplyDeleteThank you. Who is this pls ?
DeleteVery detailed Sangeeta! Great post
ReplyDeleteThank you 😊
DeleteSangeetha, what a passionate post. You got me converted and now this post.. I felt like Alice in Wonderland! ☺
ReplyDeleteMaking idlis will never be the same again. Thanks for this one! Keep it coming.
Thank you Raji :)
DeleteBeautiful read and very informative. Keep up the great work!
ReplyDeleteWoW. Simple iddly batter. Simple as some think I have seen many making Bullet Proof Iddlys
ReplyDeleteThe native combination is great
Can I use Mappillai samba instead of Kavuni and Arubadam kuruvai as iddly rice
I am an organic farmer producing rice varieties besides Urad dal and oils and milagai of my own
Satya referred your blog. Looking fwd to visiting your new acquisition. Farm to produce in Tiruvidanthai
Sir of course, I shall post mapillai samba idli recipe soon and share with you
DeleteAwesome da....will try today!
ReplyDelete